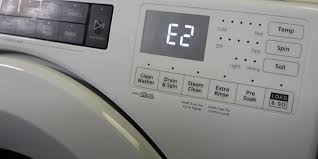
It can be incredibly frustrating when you go to do a load of laundry only to find an indecipherable error code displayed on your washing machine. While your first instinct may be to call for professional help, many common washer error codes can often be decoded and fixed with some DIY troubleshooting.
In this comprehensive guide from Fix4U Repairs in the GTA, we’ll walk through the steps you should take when faced with a cryptic washer error code. We’ll explain how to decipher the code, diagnose the likely cause, and correct the issue yourself. With a bit of elbow grease and detective work, you can get your washer running smoothly again.
- 1 Step 1: Locate Your Washer’s Service Manual
- 2 Step 2: Unplug the Washing Machine
- 3 Step 3: Check Water Supply Connections
- 4 Step 4: Inspect the Drain System
- 5 Step 5: Test Door Lock Functionality
- 6 Step 6: Check Control Board for Faults
- 7 Step 7: Verify Proper Electrical Connections
- 8 Step 8: Replace Defective Components
- 9 Step 9: Reset and Test After Repairs
- 10 Step 10: Call for Professional Service if Needed
Step 1: Locate Your Washer’s Service Manual
The very first thing you should do when seeing an error code is dig up your washer’s owner’s manual or service manual. Most manuals will include a section on error codes that explains what each code means. This will give you an immediate head start in diagnosing the problem.
If you no longer have your manual, check the manufacturer’s website to see if it can be downloaded digitally. You can also sometimes find the specific list of error codes for your model with an online search. There are also some great YouTube videos that go through common washer error codes for various brands.
Knowing the proper definition of the code you’re seeing will give you insight into which part or system is malfunctioning on your washer.
Step 2: Unplug the Washing Machine
Before doing any troubleshooting, unplug your washing machine from the power source. This resets the internal computer and will clear the error code from the display.
Leave the washer unplugged for at least one minute before plugging it back in and restarting it. Many error codes can be resolved with this quick reset. The code appearing again after restarting indicates there is still an underlying issue that needs addressed.
Pro tip: Take a photo of the error code display before unplugging so you have a record of the exact code for reference.
Step 3: Check Water Supply Connections
If an error code indicates problems with the washer’s water supply, one of the first things to check is your water connections. Start by verifying both the hot and cold water taps are turned on fully. Kinks in the inlet hoses could obstruct water flow, so inspect the lines thoroughly. If they are cracked or bulging, replace hoses immediately.
Detach the hoses from the back of the washer and inspect the screens inside the valve ports. Clogged screens can block water flow. Use a toothbrush or other small brush to clean out any debris if needed. Also check that the screens are not cracked, as this can lead to leaks.
While the hoses are detached, do a quick visual check that the water inlet valves are functioning. Have someone briefly turn on each water tap while you observe if water flows properly through the open valve ports. If not, the valves may need to be replaced.
Once everything is inspected and clean, reattach hoses and tighten by hand. Turn on taps and check for any leaks at connections before restarting your washer. Running a quick diagnostic cycle will confirm if water flow was the issue.
Step 4: Inspect the Drain System
Many washer codes point to problems with draining, which is most commonly caused by a clogged or kinked drain hose. Start by removing the drain hose from the drain pipe or standpipe it empties into. Inspect inside the hose for any obstructions like accumulated lint, coins, socks etc.
Clear out any debris, then use a hose clamp to secure the hose if detached from the washer drain port. Make sure there are no kinks or tight bends in the drain hose that could impede water flow. Attach the hose securely to the drain pipe or standpipe, using the appropriate adaptor if needed. Support the hose with a zip tie if necessary to prevent sagging.
If the washer drain system uses a drain pump, check the pump filter for any blockages. Your manual will show the location and steps to clean this easily overlooked spot. A toothbrush is perfect for scrubbing out accumulated gunk. Be sure to replace any removed hoses or filters correctly when finished.
Step 5: Test Door Lock Functionality
If an error code indicates a door or lid that won’t lock, first check for any obstructions keeping it from closing completely. Once clear, test the door lock manually while powered off. The door should click and lock into place when pressed firmly shut.
If the door does not lock properly, the latch assembly may need to be adjusted or possibly replaced. Your manual will provide the proper procedures. Some models have a small access panel that allows you to reach and tweak the lock mechanism.
Caution: Do not attempt any adjustment if water remains in the wash drum, as opening a washer mid-cycle can result in flooding. Make sure the drum is fully drained first.
Error code on your washer? Call Now and Fix your Washer!
Step 6: Check Control Board for Faults
For codes pointing to main control board failure, there are a few basic checks you can do before replacing the costly part. First, inspect the board casing closely for any signs of physical damage, burned spots or loose wires. Unplug power before using compressed air to blow out any dust or debris that may have accumulated on the board.
Reconnect all wires and harnesses to ensure proper seating. Check wire connectors for damage or corrosion and replace any suspect wires. Control boards often fail when voltage drops occur, so use a multimeter to test voltage at the power source. Input must match the washer rating, typically 120V.
If no issues are found, test functionality by running a short cycle like express or quick wash. The board may have just needed a reset. If the error code persists, replacement may be required. Installation difficulty varies by model, so consider calling for service.
Step 7: Verify Proper Electrical Connections
Several washer error codes point to problems with electrical components and wiring. Start by unplugging the machine and inspecting the power cord for damage. Contact between bare wires and metal parts can cause shorts. Replace cords that are frayed, cracked or melted.
Remove the top panel of the washer to access internal wiring harnesses. Check that connections are secure on the main electronic control board and at component plugs. Wiggling harness wires and connectors can expose loose contacts. Fix any observed corrosion with electrical contact cleaner spray.
Inspect door switches, thermal fuses, heating elements and motors for loose or damaged wires. Continuity testing with a multimeter will help pinpoint any broken wires not visible. Simple connection issues can often be the culprit with electrical error codes.
Step 8: Replace Defective Components
For some fault codes, troubleshooting steps will reveal that a specific washer component has failed and needs replacement. Common culprits include water inlet valves, door locks, control boards, drain pumps and drive motors. It may be worthwhile to contact Fix4U Repairs at (647) 363-5205 for advice, as some parts require significant labor to access and replace.
When ordering new parts, provide your complete model number to ensure getting the proper replacement. Refer to repair videos for your model when tackling do-it-yourself component installation. Improperly installed parts can quickly fail, so take the time to carefully follow proper procedures. With a bit of patience, you can handle many washer repairs yourself.
Step 9: Reset and Test After Repairs
Once repairs or replacements are complete, plug the washing machine back in and select a regular wash cycle. Avoid overly loading the drum on the first test run. Listen and feel for proper operation through each cycle stage, from filling to agitation to draining and spin.
If any problems occur, immediately stop the cycle and investigate the issue. Part installations may need adjustment or connected hoses could have leaks. Better to catch minor problems now rather than after fully restarting service.
When a normal cycle completes with no apparent issues, run a second empty cycle using hot water and a sanitize setting. This helps flush any residual debris and ensures proper sanitation. With testing complete, your washer should be ready for regular duty.
Step 10: Call for Professional Service if Needed
While many error codes and malfunctions can be resolved with some DIY troubleshooting, don’t hesitate to call Fix4U Repairs if problems persist. Our experienced technicians can accurately diagnose complex mechanical and electrical faults. We stock a full range of OEM replacement parts to get your washer running optimally again.
Critical safety issues like electrical shorts, damaged hoses and belt or motor problems often require a professional repair. We want to help our GTA customers avoid causing further damage or injury when attempting their own repairs. Trust our expertise to properly identify failures and implement fixes.


